
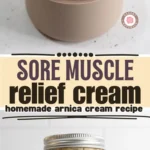
Soothing DIY Arnica Cream Recipe For Sore Muscle Relief

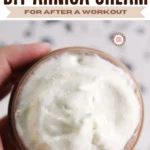

This easy DIY Arnica Cream is perfect for tired, sore muscle relief.
Whether you’re winding down after an intense workout or just battling the stiffness that sneaks in after a long day, sore muscles demand care that’s both effective and gentle. This DIY Arnica Cream offers just that—a soothing balm that targets muscle tension and swelling with the natural power of arnica, essential oils, and nourishing natural shea butter.
Sometimes, your body just needs a little extra care—and this soothing DIY Arnica Cream is the perfect home remedy.
This post may contain affiliate links. Read my disclosure policy.
Disclaimer: These statements have not been evaluated by the Food and Drug Administration. This information is not medical advice and not intended to diagnose, treat, cure, or prevent disease. If you have a medical condition, please consult your doctor before using essential oils.
Pin for later

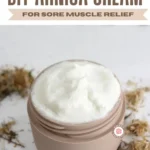
This homemade arnica cream is moisturizing, great at soothing sore muscles, and simple to make at home. Whether you’ve had a long day, a tough workout, sore joints, or just want to support your skin naturally, this cream gives you that comforting touch your body craves.
Made with a blend of healing herbs, rich butters, and essential oils, this arnica cream is both practical and a little bit luxurious.
Why You’ll Love This Arnica Cream
Soothes Sore Muscles Arnica has been used for generations to help with swelling, bruises, and muscle tension. When added to a homemade cream, it becomes a go-to for those days when your body needs a little muscle relief and recovery. Use it after a workout, long walk, or when you just feel sore.
Natural Anti-Inflammatory Properties: Arnica contains compounds which work to reduce swelling and inflammation in muscle tissue and joints.
Accelerated Bruise Healing: It stimulates white blood cell activity, helping the body process congested blood (bruises) and trapped fluids more efficiently.
Customizable Potency: When you make it yourself, you can adjust the concentration of arnica-infused oil to suit your specific needs, whether you want a mild daily rub or a high-strength recovery balm.
Control Over Ingredients: You can avoid the synthetic fragrances, parabens, and preservatives often found in over-the-counter creams. Using high-quality carriers like shea butter or coconut oil provides extra skin nourishment.
Enhanced Blood Circulation: Massaging the cream into the skin helps stimulate localized blood flow, which carries oxygen to tired muscles and aids in the removal of lactic acid.
Cost-Effectiveness: Buying dried arnica flowers in bulk and infusing your own oil is significantly cheaper in the long run than purchasing small tubes of premium arnica gels from the pharmacy.
Pain Relief without Side Effects: Using Arnica topically provides localized relief without the risk of stomach upset or other side effects.
Ingredients You’ll Need for Your Arnica Cream

This recipe makes around 12 to 14 ounces of cream. You’ll need:
- Arnica flowers
- Carrier oil (I used avocado oil, but any gentle oil will work)
- ½ cup shea butter
- ¼ cup coconut oil
- ¼ cup arnica-infused oil (from the arnica flowers and carrier oil)
- 15 drops essential oils (optional)
- Clean silicone containers or amber glass jars
Let’s explore how each ingredient helps create this soothing cream:
Arnica Flowers
Arnica is the powerhouse of this recipe. Its calming and skin-soothing properties make it ideal for tired muscles, bruises, and general aches.
I love using dried arnica flowers to infuse into oil because the infusion process draws out everything good from the flowers and makes this cream so beneficial.

Carrier Oil
This is the base for your arnica infusion. I usually reach for avocado oil because it’s rich, moisturizing, and blends well with butters. It gives the final cream a nourishing, silky feel that lasts on the skin. You can also try other oils like almond or jojoba. Each one has its own texture, and I like that this recipe lets you adjust it based on what your skin loves most.
Shea Butter
Shea butter brings a rich, creamy texture to this blend. It’s deeply moisturizing and gives the cream a whipped, fluffy feel that’s soft but not greasy. I love how it helps hold everything together while still feeling lightweight. It’s one of those ingredients that just makes the whole recipe feel extra nourishing.
Coconut Oil
Coconut oil adds a lovely softness and helps the cream spread easily. It blends beautifully with shea butter and gives the cream a light, smooth finish. I like how it melts into the skin quickly and leaves it feeling comforted without being too heavy.
Arnica Infused Oil
An arnica infused oil is how you’ll extract the beneficial properties of the arnica flowers. Once the arnica flowers have soaked in the carrier oil for a while, you’ll strain the mixture and use the infused oil in your recipe. It brings all the benefits of arnica straight into your skin with every application.
Essential Oils (optional but highly recommended)
Using specific essential oils can level up this arnica cream and make it even more beneficial for sore muscles.

Essential oils that can help with pain
- Lavender
- Peppermint
- Eucalyptus
- Wintergreen
- Copaiba
- Frankincense
You can leave the essential oils out if you prefer, but they really do make a huge difference.
Containers
I recommend either one of these silicone containers or amber glass jars.

Step-by-Step Guide For How To Make Your Arnica Cream
Making this arnica cream at home is simple and satisfying. Once you gather your ingredients, the rest comes together quickly. Here’s how I make mine:
Step 1. Make the Arnica-Infused Oil


Fill a clean glass jar about halfway with dried arnica flowers. Pour your chosen carrier oil over the flowers until they are fully covered. I like using avocado oil for its rich, moisturizing feel.
Jojoba Oil, Arnica Oil, almond oil or fractionated coconut oil would also be great choices.

Seal the jar and let it sit in a warm, sunny spot for about two to three weeks. Shake it gently every few days.
Once it’s ready, strain out the flowers using a fine mesh strainer or cheesecloth.
Store the infused oil in a clean bottle or jar.
Step 2: Whip the Shea Butter
Start by adding the shea butter to a stand mixer. Use the wire whip attachment if you have one. Whip the shea butter on high speed for about one minute. Then switch to low speed and whip for another three minutes. This helps soften it and gives it that fluffy texture we’re going for.


Step 3. Add the Oils
Now add the coconut oil and the arnica-infused oil to the whipped shea butter. Turn the mixer back on and whip on high for one minute. Then whip on low for three minutes. You’ll start to see everything blend together into a soft, creamy texture.
Step 4. Add the Essential Oils (If Using)

If you’re using essential oils, now is the time to add them. I usually go for about 15 drops total. You can mix and match or stick with just one. Stir gently or whip on low for one more minute. The scent should be light and natural, not overpowering.
Step 5. Transfer and Store
Once the cream is fully mixed and feels smooth and fluffy, scoop it into your clean containers. Silicone jars are easy to use, but I also love amber glass for a cleaner look. Let the cream sit at room temperature to finish setting.


That’s it—your homemade arnica cream is ready to use.
Pin for later

How to Use Your Arnica Cream
This arnica cream is meant to be simple, soothing, and part of your everyday care. Here’s how I like to use it:
- Scoop out a small amount using clean fingers or a small spatula.
- Gently massage it into the skin where you feel soreness, tension, or bruising.
- Let it absorb naturally. There’s no need to rinse.
You can use it on your shoulders, legs, arms, or anywhere that needs a little extra comfort. I often reach for it after a long walk, a workout, or when my body just feels tired. A little goes a long way.
Store your cream in a cool, dry place with the lid tightly closed. It should last about six months. If it ever changes color or smells off, it’s best to make a fresh batch.
This cream has become one of my favorite ways to unwind and give my body some much needed self care. I hope you enjoy making and using it as much as I do.
Arnica Cream for Bruises
Arnica isn’t just for sore muscles — it’s one of the most loved natural helpers for bruises and bumps, too. People have reached for it for generations to soothe the look of bruises and ease tender spots after a little knock or fall.
To use your homemade arnica cream on a bruise, gently massage a small amount into the area a couple of times a day. Use it on unbroken skin only — never on a cut or open wound. I like to keep a jar in the bathroom for life’s little bumps, and tuck one in a gym bag or hiking pack for the bigger adventures.
If you’re someone who bruises easily, this gentle Arnica cream is a simple, natural remedy to keep on hand.
More Sore Muscle Relief
Easy Arnica Bath Soak
For the ultimate in sore muscle relief, indulge in this arnica bath soak before using your homemade Arnica Cream.

DIY Arnica Cream Recipe
Equipment

Ingredients
Arnica Infused Oil
- Carrier oil avocado, jojoba, argan, fractionated coconut oil
- Arnica flowers
Arnica Cream
- ¼ cup arnica infused oil
- ½ cup shea butter
- ¼ cup coconut oil
- 15 drops essential oils optional
- Silicone container or amber container
Instructions
Infused Arnica Oil
- Fill a clean 8 oz glass jar about halfway with dried arnica flowers. Pour your chosen carrier oil over the flowers until they are fully covered.
- Let infuse for a day or up to a few weeks. The longer it infuses, the more the oil is able to absorb the beneficial properties from the arnica flowers. Give it a gentle shake every few days.
- When done infusing the oil, strain the flowers out of the oil, keeping the oil.
Arnica Cream
- Add shea butter to a stand mixer.
- Whip on high for 1 minute, using the wire whip attachment. Then whip on low for 3 minutes.
- Add the coconut oil and infused arnica oil. Whip on high for 1 minute, then on low for 3 minutes.
- Add the essential oil if using.
- Whip on low for one minute, or until the mixture is light and fluffy.
Notes
- Essential oils are optional. Some great choices would be Lavender, Eucalyptus, Copaiba, Frankincense, wintergreen (for pain).
- Any carrier oil will work for the infusion. I used avocado oil. Jojoba oil, argan oil, fractionated coconut oil are also great choices.
- This should last for around 6 months. There is no need for a preservative since no water is being introduced. Also, the essential oils will help act as a preservative. If it looks weird or smells different, throw away and start a new batch.


 10")
FAQs about Arnica Cream
A Quick Safety Note
While arnica is a powerhouse for external use, it’s important to remember:
- Never apply arnica to broken skin or open wounds, as it can cause irritation.
- External use only: Arnica should not be ingested unless it is in a highly diluted homeopathic pill form.
Before You Go, See What’s New
More recent posts

 2")
 3")


 6")


Dawn Goehring
Hi! I’m Dawn, the founder of Desert Naturals. My family , including my 2 teen boys, husband and myself, live in the southern California desert, I’m passionate about natural living and a life free of synthetics, dye’s, artificial fragrances, and other harmful ingredients. I love to use essential oils and natural ingredients for pretty much everything from natural remedies for my family, to non toxic cleaning for my home, to making my own DIY Beauty products, self care products, and more.


I was skeptical at first, but this arnica cream really works. Never going back to store-bought.
Great
looks cool, might try it sometime.
Absolutely adore arnica. Thanks for the DIY guide, Dawn.
Perfect for my hiking trips. Thanks!
I’ve been growing arnica for years without fully utilizing it. This cream is a fantastic idea.
love it!
gonna try this for my back. sounds perfect.
Great for post-workout soreness. I’m in.
Arnica is such an underappreciated ingredient! Love how you’re bringing attention to it, Dawn.
Finally, a use for the arnica I’ve been growing! Thank you!
Appreciate the emphasis on simple, natural ingredients. It aligns with my values.
I’m all for natural ingredients, and this cream sounds perfect! So excited to make my batch this weekend!
might give this a go, looks easy enough
Love this! Arnica has been a game changer for me. Can’t wait to try your recipe, Dawn!
This is just what I was looking for. Definitely works!
I just made this cream and it feels amazing already. thanks for sharing!
Hey, can I use olive oil instead of the carrier oil suggested?